In digital dentistry, no single factor influences the success of a restoration more than margin clarity. Margins are the thin—but critically important—boundary where a designed restoration meets the tooth preparation. Their precision determines whether a crown seats passively, whether cement seals correctly, and whether the long-term biological environment remains healthy.
With the rise of intraoral scanning, dentists are sending more digital impressions than ever before. But digital impressions are not immune to error. A blurry margin, an incomplete gingival capture, or a scan with insufficient detail can cascade into downstream issues that compromise the entire restoration.
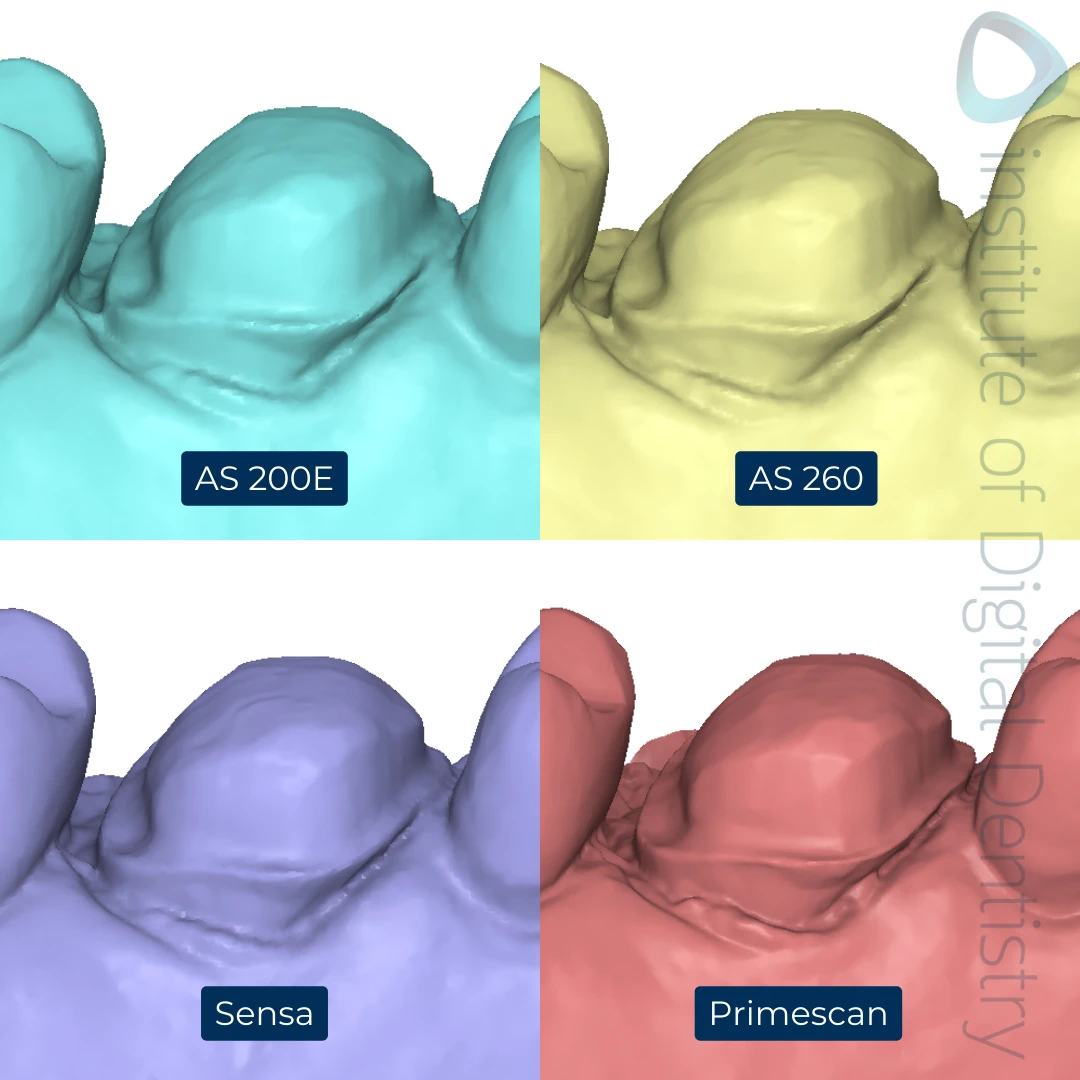
At VCAD Dental Outsourcing Lab, margin clarity is treated as the starting point of accuracy. Before the team designs a crown, veneer, or bridge, the scan undergoes a rigorous analysis to ensure the data reflects real clinical anatomy. If margin clarity is poor, no amount of CAD skill or milling technology can save the restoration. Understanding why margin clarity matters — and how scan quality affects the outcome — is essential for every clinician and lab.
1. Margin Clarity — The Invisible Decider of Clinical Success
Margins mark the line between the prepared tooth and the future restoration. Everything the lab designs depends on whether those margins are captured clearly. If the scanner fails to capture detail, the design becomes a guess — and a guessed margin always leads to compromised fit.
1.1 Why margins matter biologically
Poorly captured margins can cause:
- open margins
- cement washout
- secondary caries
- periodontal irritation
- chronic gingival inflammation
A restoration may look beautiful externally but still fail clinically due to biological consequences hidden beneath the gum line.
1.2 Why margins matter mechanically
A crown with unclear margins will not seat passively. This leads to:
- micro-rocking
- internal binding
- reduced retention
- uneven occlusion
- excessive chairside adjustment
Over-grinding a ceramic restoration weakens its structure and may lead to early fractures.
1.3 Why margins matter digitally
Digital workflows amplify the importance of clarity. When the scanner misses detail, CAD software automatically “fills in the gaps,” leading to:
- rounded line angles
- inaccurate emergence profiles
- distorted cervical contour
The software cannot invent what it cannot see.
Margin clarity is the foundation upon which all digital precision stands.
2. What Causes Poor Margin Capture in Intraoral Scanning?
Even the best scanners struggle under certain conditions. Understanding these challenges helps clinicians prevent avoidable errors.
2.1 Moisture and Contamination
Saliva, blood, or crevicular fluid can obscure:
- margin lines
- subgingival anatomy
- axial walls
Even small droplets create reflective surfaces that scanners cannot penetrate.
2.2 Inadequate Soft-Tissue Retraction
If the gingiva covers the prep edge, the scanner will only capture the visible portion, leaving critical margin data missing.
Common issues include:
- inadequate cord placement
- incomplete tissue displacement
- swollen gingiva after preparation
- lack of hemostasis
2.3 Incorrect Scan Path
Scan path errors such as:
- scanning too far away
- scanning too fast
- skipping surfaces
- distorting angles
can result in loss of geometric accuracy.
2.4 Scanner Limitations
Each scanner has a different optical system, depth accuracy, and resolution. Cheaper or outdated scanners may not capture deep margins or reflective surfaces well.
VCAD’s scan validation software checks for these issues before the case enters design, ensuring no flawed data moves forward.
3. How Scan Quality Directly Affects Restoration Accuracy
Even a small margin inconsistency can disrupt the entire workflow.
3.1 Incorrect Margin Design
When margins are unclear, CAD technicians must manually interpret the boundary — a risky step. Misinterpretation often leads to:
- overextended margins (traumatizing gingiva)
- underextended margins (open margins → caries risk)
- uneven emergence contour
3.2 Internal Fit Problems
Poor scan = distorted prep
Distorted prep = distorted internal architecture
Distorted internal architecture = crown that does not seat
Internal misfit leads to:
- rocking
- high occlusion
- contact point errors
3.3 Increased Remake Rates
The number-one cause of remakes in digital labs globally?
Poor scans and unclear margins.
A remake doesn’t only cost material; it wastes time, reduces patient trust, and disrupts clinic schedules.
3.4 More Chairside Adjustments
When fit is compromised, dentists spend more time:
- adjusting contacts
- recontouring occlusion
- refining margins
- rebonding or reseating restorations
This increases procedural risks and patient discomfort.
Margin clarity literally saves time on both sides.
4. How VCAD Ensures Perfect Margin Interpretation
VCAD applies a structured protocol to guarantee margin clarity before design begins.
4.1 Automated Margin Visibility Mapping
Software analyzes the scan to detect margin regions with:
- insufficient pixel density
- unclear edges
- surface noise
- overlapping tissue
If any area falls below the clarity threshold, the case is flagged.
4.2 Human Margin Verification
After the automated check, a trained case coordinator reviews:
- gingival contour
- margin continuity
- emergence profile
- occlusal-axial transitions
This dual-layer system combines machine precision with clinical judgment.
4.3 Communication With Clinician
If margin clarity is insufficient, VCAD sends:
- screenshots
- highlighted problem regions
- recommendations for rescanning
Dentists appreciate this proactive communication because it prevents failures, not just reports them.
4.4 Margin Refinement During CAD
Once the scan is validated, CAD designers:
- apply controlled smoothing
- ensure absolute continuity
- avoid over-sharpening or flattening
- calibrate margin thickness based on material
This results in restorations that not only fit but integrate naturally with tissue.
5. Clinical Tips for Capturing Perfect Margins Every Time
5.1 Ensure total moisture control
Use:
- cotton rolls
- high-volume suction
- hemostatic agents
- saliva ejectors
Dry margins = clear margins.
5.2 Achieve full gingival retraction
Options include:
- double-cord technique
- retraction paste
- electrosurgery (when indicated)
- laser troughing
5.3 Maintain a clean prep design
Rounded line angles and smooth walls scan more easily.
5.4 Follow an optimal scan strategy
General guideline:
- Start from occlusal table
- Move to lingual
- Rotate to buccal
- Capture margins slowly
- Recheck in real-time viewer
5.5 Review scans chairside
Always verify:
- margin visibility
- prep completeness
- correct bite capture
These steps dramatically improve lab outcomes.
Margin clarity is the foundation of digital accuracy. Without it, even the best CAD system or milling machine cannot produce a restoration that fits, functions, or lasts. Inaccurate margins lead to biological risks, mechanical problems, and increased chairside adjustments.
VCAD’s comprehensive approach — from automated scan analysis to human verification and precise CAD refinement — ensures that margins are not just visible, but clinically reliable.
In digital dentistry, accuracy begins with clarity.
And clarity begins at the margin.